Showing posts with label Spray Paint. Show all posts

Sunday, February 26, 2012

Happy Birthday Kali Part I - Making Miniature Chalkboard Signs

Well.....it's been two weeks now....and I still haven't posted about my little girls birthday party.....it was SO fun.....so I'm really excited to share the details :)

But the truth is that I am waiting to get pictures from my brother and sister-in-law's camera....they always take most of the pictures (and I am SO thankful) b/c I never have time to take any.....I'm always running around like a crazy person trying to make sure everything is going ok and everyone is having fun!! 

BUT....I do have a few pictures that I took before the party.....so I thought I would share one of the fun little things that I put together to decorate the birthday girls table of goodies :)

SO......what am I talking about.....well....here's a hint.....


Yep.....that's right....I made some cute little chalkboard signs to decorate our party table :)

I was so happy with how they turned out.....and they were SUPER easy to make!!

I started out with some very cheap picture frames from Wal-Mart.....I think the bigger one (black frame) was $2 and the little plastic one was less than $1....


And then I got some Krylon Chalkboard Spray Paint......Ohhhh....yeah.....ya'll know about my love for spray paint :)


This was my first time to use chalkboard paint.....and I've wanted to try it for a while.....so I was pretty excited to finally have a reason to try it out!!

SO.....I just took the glass out of the frame and gave it a good spray paint job.....if you've forgotten my tips for a good spray paint job.....then go HERE to get a refresher......but of course....no need to sand the glass :)

And soon.....I had these.....


TOO CUTE!!  BUT I can't take any credit for the cute chalk work.....my sister did all of the "writing" on the chalkboards.....and I thought she did a great job.....chalk can be a little difficult to work with.......

And....then I decided to add a little ribbon with some double sided tape, so that the chalkboards would have some coordinating color......

Here is one after the ribbon was put on......


AND....just for fun.....here's a little sneak peak at our birthday table with our chalkboards in place.....

The Candy Bar......those little SweetTart Gummies were delicious.....people just kept talking about those.....I think they might be addictive....LOL......


And my favorite.....The Chocolate Bar......

YUMMMM.....Lot's of Hershey's Kisses :)


And the really cool thing....since they are chalkboards.....you can just erase them and use them again....so I used them for the Hubs birthday too......after I removed the ribbon of course :)


Super cool....I'm thinking you'll see them show up again in the future....perhaps in my holiday mantle decor....or something.....

SO.....I can't wait to show you the rest of the party details!!  As soon as I get the pics....I promise I'll share :)

SO.....anyone else out there experimented with chalkboard paint?  PLEASE DO TELL!!  I have to say....I'm diggin it!! 

Well....it's getting late.....so I guess I better run....

Until next time.....

XOXO-
Kristal

Sharing With....

Saturday, October 15, 2011

DIY Half Bath Makeover

Hello friends!!  I hope you all are enjoying a relaxing weekend....

So....today I'm thinking about our half bath makeover.....do any of you have one of these little guys tucked away somewhere in your house?  Well....we do....and like most things "tucked away" it didn't get much attention for a LONG time!!  And let me tell you....whoever originally decorated this baby.....well....I guess I'll be nice and just say.....we do not have the same taste :)

When you get right down to it.....there really isn't much to talk about on the "Before"......but if I didn't share it with you, then you couldn't really appreciate the "After"......right??  So.....

On the upside of the "Before".......there was a very nice pedestal sink in there and cabinets above the toilet that match the rest of the house.....yep......that's about it on the good side........

On the downside of the "Before".......the walls were covered with hideous wallpaper......geez I so wish that I had a close up of this stuff......it was made to look like a bunch of newspapers were pasted together.......yep.......IT WAS BAD!!  Also the fixtures were pretty outdated......lovely silver and gold.....

And.....here is the "Before".....


I know the picture is not that good......but.....well......I didn't have much to work with......and this room is REALLY hard to photograph.....

So.....let's get on to the good stuff......first we had to come up with a plan of attack.....

The hubs did some research and decided that we could paint over the wallpaper......hmmmmm.....have any of you guys tried this technique?  In our case the wallpaper was stuck pretty well to the wall.....so we figured it would be hard to get off.....and we were determined to make this a total DIY job!

Well....at least we thought it was stuck well.....but when we looked really close....you could see a few places where the wallpaper was pealing......so can't paint over that......but we were already set on this plan......so we trudged ahead......

The hubs did some more research and found that we needed to do the following in order to paint over the wallpaper......

1.  Peel off all loose wallpaper
2.  Apply "mud" over the areas where wallpaper was removed
3.  Put "mud" over all wallpaper seems
4.  Sand down all "mudded" areas until you have a smooth surface again
5.  Paint over everything with a oil based primer (can't use water based due to solubility issues with wallpaper glue)
6.  Paint with your color of choice

Sounds like a lot of stuff....huh......well.....we still thought it was faster than trying to peel off a million little pieces of wallpaper!

Ok.....so that takes care of the paint.....btw......we used Vast Desert Behr paint with Primer.....
And we ended up with this.....


Yahoo!!  Things were looking better already!!  Next we decided to address the fixtures.....I am a REALLY lucky woman, because my husband is very resourceful!!  He changed out the faucet on the sink and took down/put back up the light fixture!  BABE -- YOU ROCK!!

So we ended up with this (faucet from Lowe's)....


And I made over the existing light fixture with some ORB spray paint and a couple of new globes from Lowe's.....WOW.....what a difference a little spray paint can make!!


We also decided to turn the fixture upside down......why?.....well......turning the bulbs toward the ceiling really warmed up the light in this space.....

We also replaced the mirror in this space with a big chunky one.....I love picture frames, mirrors, molding, etc.....with big chunky frames!!


AND.....this is a half bath.....so....in my opinion.....it's a place where you can also have a little fun and show some of your personality.....

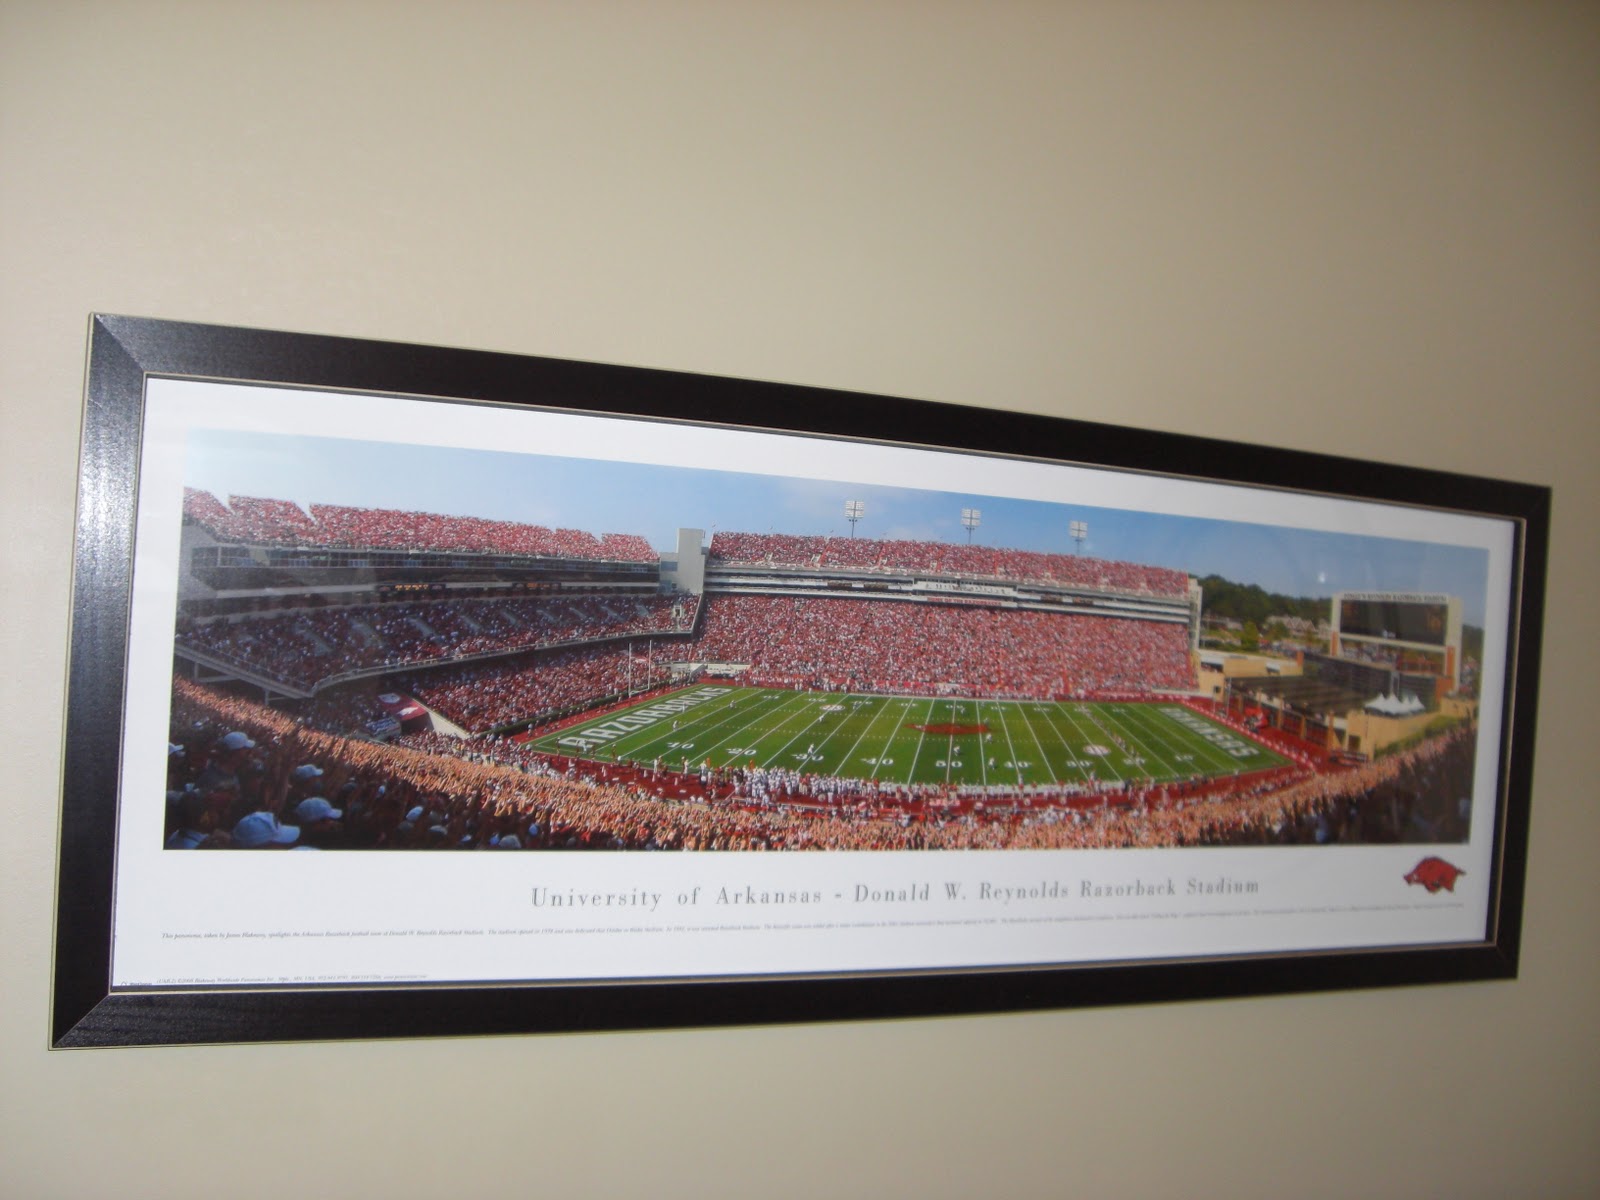
So we decided to add a little Arkansas Razorback love!!  Our friends gave us this awesome picture for Christmas last year and it fit perfectly in this space.....


It is a full picture of the Razorback Football Stadium in Fayetteville.....ahhhhh.....reminds us of home :)

We loved it so much that we decided to add a little more Hog flare on the other side of the room....

And here's an up close look at some of the accents in the room.....


The brown and red hand towels are from World Market, the brown hand towels with red stripes are from Target, the picture frame came from Hobby Lobby, and the "vase" came from Target.

The little shelf that the picture frame is sitting on was a spray paint makeover.....it was a shelf that was collecting dust in a closet b/c I didn't like the color.....so I just use my trusty ORB Rustoleum spray paint to quickly make it over......did I mention I love spray paint.....oh yeah.....I guess I did!!

And here's a look at the last two additions.....


And a rug to warm up the floor a little bit.....


The candle holder and the rug are both from Target.....

So.....we were so happy with how it all turned out.....the best part.....this was a one weekend project!!  AND it just looks SO different......so warm......

I'm sure we may add this or that to this room later, but for now we are calling it DONE!

So what about you guys.....anyone thinking of tackling a bathroom makeover.....are you going small.....like our little makeover......or are you thinking big......like a gut job?  I'd love to hear what you guys are working on!!

Until next time......

XOXO,
Kristal

I'm linking up here.....


Wednesday, October 5, 2011

More Spray Paint Love....a Ceiling Fan Makeover

Hello all!!  Well it's been an eventful start to the week....I won't get into all the details, but Thanks Be to God that everything has worked out ok!!

So....I've already professed my love of spray paint to you all....so since my secret is out....I thought it was time to show you another spray paint project....

So....as usual.....I didn't take enough pictures.....ugh!!  I promise....I am doing better on this.....there will be posts with sufficient pics in the future.....promise!!  But for now.....we'll just have to make do.....don't worry I've got the Before and After pics and that's really all that matters anyway!!

So here's the deal with our house.....the people who built it really spent some $ in some areas.....and really didn't spend $ in other areas.....it is BIG TIME obvious!!  One area that they did not spend $ on was fixtures.....they were SO bad!!  We've changed out a lot of them and made over some others....so today I'm sharing one of these lovely hideous fixtures and how I made it over with just a little spray paint.....

So.....this is what I started with.......

I know......I know......isn't it SO beautiful awful.......go ahead......bask in the glow of it's loveliness hideousness......Ha!  Sometimes you just gotta laugh....ya know......

It is one of those contractor grade ceiling fans....white.....with gold.....oh yeah....so not my favorite!  This baby was living in our guest room.....and since we don't go in there all that often.....it had survived in there WAY TO LONG!  Our guest room has a black headboard and black furniture.....so I decided to make the ceiling fan match.

So first I got the hubs to take it down for me and then help me take it apart.  It was kinda dirty....yuck....so I gave everything a good wipe down.  And then out to the garage for a little makeover.....

Remember all those SECRETS that I told you about a successful spray paint job.....well....if you've forgotten, then go here to refresh your memory.

In addition to spray painting the blades and the body of the fan (make sure you have separated out the motor part -- you don't want to get any paint in there!!).....I decided that I wanted to also do something with the glass globes (where the light bulbs are).....so I got some frosting spray (which can be found in the spray paint section at Lowe's or Home Depot) to frost those baby's......the frosting spray is so cool....and very easy to work with.....

This was a quick and easy project.....just the way I like 'em!

And.....here's what I ended up with......


And here's a look with the light on.....


And just one more.....Before and After side by side....


Ok....so not too shabby....seriously.....it looks SO MUCH BETTER!!  And it finally matches everything else in the room....Yay!!  The best thing....it cost next to nothing to make this much needed change....Yahoo!! 

So.....have any of you caught the spray paint bug yet?  Anyone thinking about tackling a project like this?  PLEASE....DO TELL......I would love to hear about it :)

Until next time....

XOXO,
Kristal

I'm linking up here.....

Sunday, September 25, 2011

Spray Paint Love....Door Knob Makeovers

Hello all!  It's been too long....I've missed you :)  Well.....I guess its only been a couple days....but still.......

I've been loving on a sick baby, so life's been busy.....just not with the usual fun stuff!!

But.....the good news.....since I've been stuck at home....I've had some time to work on a few projects that I've been putting off have been on my list for a while.....

So.....I wanted to share one with you today......but first.....have I told you about my obsession love of spray paint.....I haven't?  Well.....how else can I say this.....I love spray paint!!  It is SO cheap and you can really do some amazing things with it!!

So.....here is the first of many transformations that I'll show you using my friend spray paint....

I started with these lovely awful gold colored contractor grade door knobs....


Ummm....yeah....gag!  I really don't like them!!  At all!  But I have lived with them for 10 years....because.....they are everywhere in our house!  And.....I looked into buying all new door knobs for the house.....and oh my goodness.....that wasn't going to happen......because they are so stinkin expensive!  Ugh!!  SO.....I had to come up with another solution to this problem.....I mean 10 years is long enough to suffer live with these lovelies.....

And honestly....this is what got my love of DIY started.....I happened to read on someones blog about how they painted the door knobs in their house.....You can check our their posts here and here.....and I thought.....even I can do that......

So.....here we go.....

Another pic of what we are starting with (please ignore the messy garage)....


So let's get started on the transformation.........first take some sandpaper and sand those babies down....I used 320 grit, because you don't want to scratch the surface....just rough it up a bit.....


After you've sanded them down pretty good.....then make sure that you wipe them totally clean....


Next....lay them all out on a surface where you can paint them....


At this point some people choose to put on a layer of primer.....I don't do this......why.....probably because I am a little lazy I want to speed up the process a little.....it's up to you whether to do it or not.....I don't and so far so good.......

So now it's time to get out your good old friend....spray paint....I like to use Rustoleum Oil Rubbed Bronze (available at Lowe's or Home Depot).....


Ok.....now....listen up.....SERIOUSLY.....I am about to reveal the SECRET TO A SUCCESSFUL SPRAY PAINT JOB.......

The secret is....you must be patient with the spraying......when painting you need to make short quick sprays.....and you probably won't get the whole surface covered during your first spray.

Then you need to wait about 10 minutes or so for your first round of spray to dry....and then repeat your spraying process (again with the short quick sprays)......then wait 10 minutes......repeat.....repeat.....and so on until the entire object is painted......

Now....the reason for the short quick sprays is to keep from getting drips or runs or build up in certain areas.....I promise it is SO worth it just to take your time and do it right the first time!!

However, if you do get a little antsy and spray to much and get a drip, then just immediately wipe it off.....and then spray over it again.

After a first spray, my door knobs looked like this.....


And here's a look up close (notice how you can still see some gold after the first spraying)....


And after a few more rounds of spraying and drying here's how they looked......


And here's a look up close.......


Turned out pretty good.....the light is reflecting a little weirdly here.....but I promise the gold is GONE....and the beauty of the Oil Rubbed Bronze is here to stay!!

Oh yeah.....another quick SECRET.....make sure to let your door knobs (or whatever you are spraying) to dry completely.....this allows for the paint to cure fully......my rule is to leave my sprayed objects alone for a minimum of 24 hours after the final spray.  If you can.....then I would leave them even longer....the curing of the paint is critical for longevity!!!

Here's a look at the "new" door knobs back in their rightful places (the color in these pics is better)....


And how about a little before and after action.....

And a look at the other doors in this room......


I love the new color....isn't ORB (Oil Rubbed Bronze) just awesome!  Love it!!

Ok....so I bet some of you are thinking.....yeah, yeah.....great.....but how does it hold up?  Well.....I did these this weekend, but I did all of the door knobs on our downstairs doors about 6 months ago and they are still looking great! 

I have seen a couple of "dings" on our highest traffic door (kitchen food pantry) AND if you've read this blog before you probably already know how I took care of those places......yep.....that's right......I just used a Sharpie marker to dab on a little color over the dings.......YOU CAN'T EVEN TELL......I SWEAR......the ORB is just so dark that a little dab of the Sharpie doesn't really show up.....

So.....how about just one more after pic....just for fun......


Well......anyone getting the spray paint bug?  I'm telling you.....if you ever pick up a can......well.....it's sort of hard to stop......you just start seeing how everything around you could be made over.....with just a couple quick sprays of this or that......

Seriously.....it's kind of an sickness.....  :)

Until next time....happy spraying!!

XOXO-
Kristal

I'm linking up here.....
Related Posts Plugin for WordPress, Blogger...